I was approached by Luna Chai to create a series of 3D models for the series Airlean Tales. The models were made to be imported into CLIP STUDIO PAINT, for use as painting reference for the illustrations. These models include weapons and some extra objects like a mask. I've never created models for CSP before, but I decided to create them with a lower polycount so they would be easy to open in any program. My own experience with CSP is on my iPad, and I know it sometimes struggles with heavy 3D models! So for this project, I focused on creating models that were accurate to the concept art and didn't have a terribly high polycount.
Final project page can be found HERE. Unless otherwise noted, all models were made in Blender. All concept art is by Luna Chai!
✧
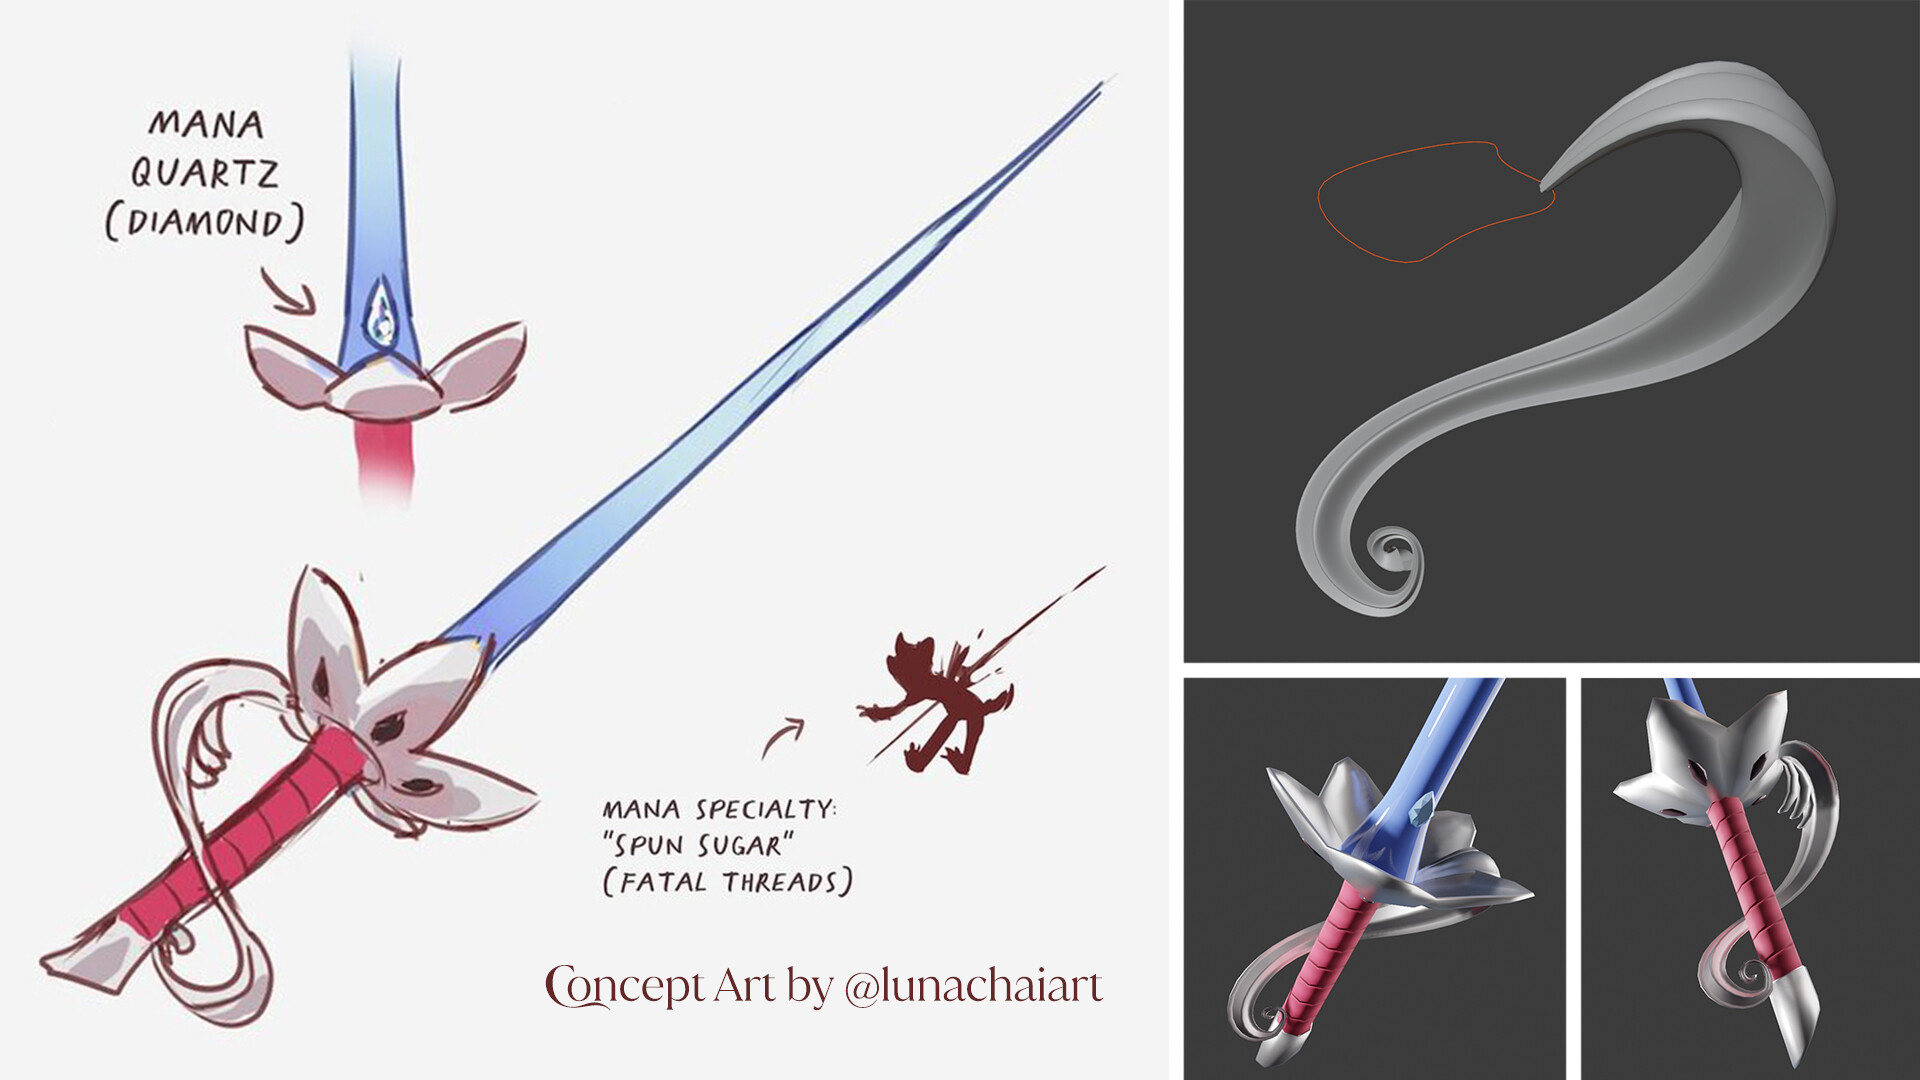
Karis's Sword

- Karis's sword resembles a rapier, but the guard is shaped like a plum blossom and inverted. The knuckle guard is elaborate and wraps around the handle of the sword. It's very pretty!
- This was the first one I made, so I was figuring out my process at this point. The hardest part was the knuckle guard, because the form is delicate and beautiful, tapers differently across the entire guard, and it wraps around the sword in a way that would be difficult to do with box modeling. I used curves and a curve profile to make it, which allowed me to make it smooth, tapered, and easily editable.
✧
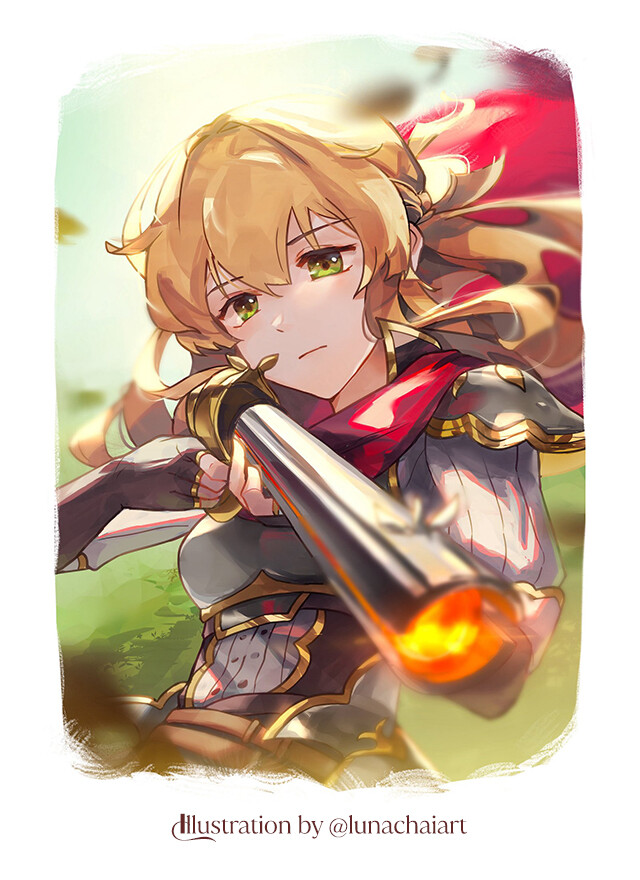
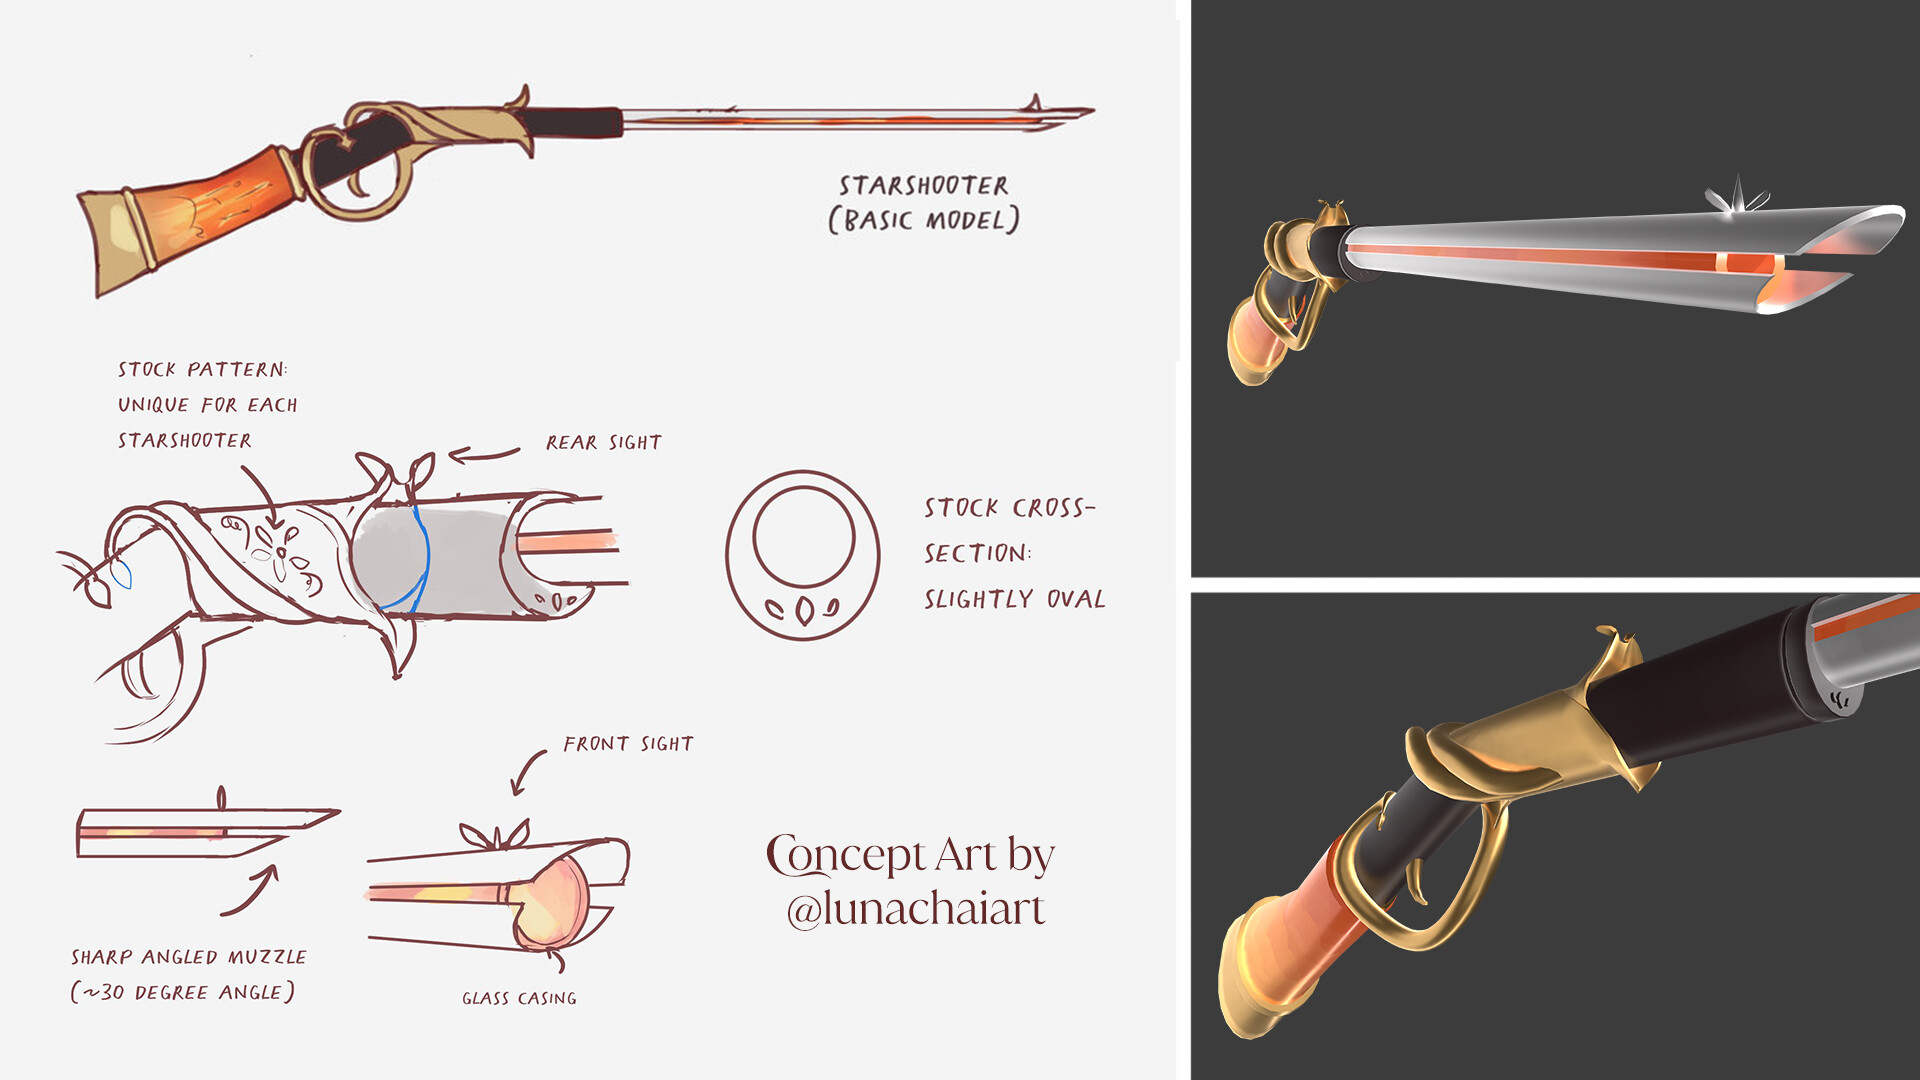
Azalea's Gun
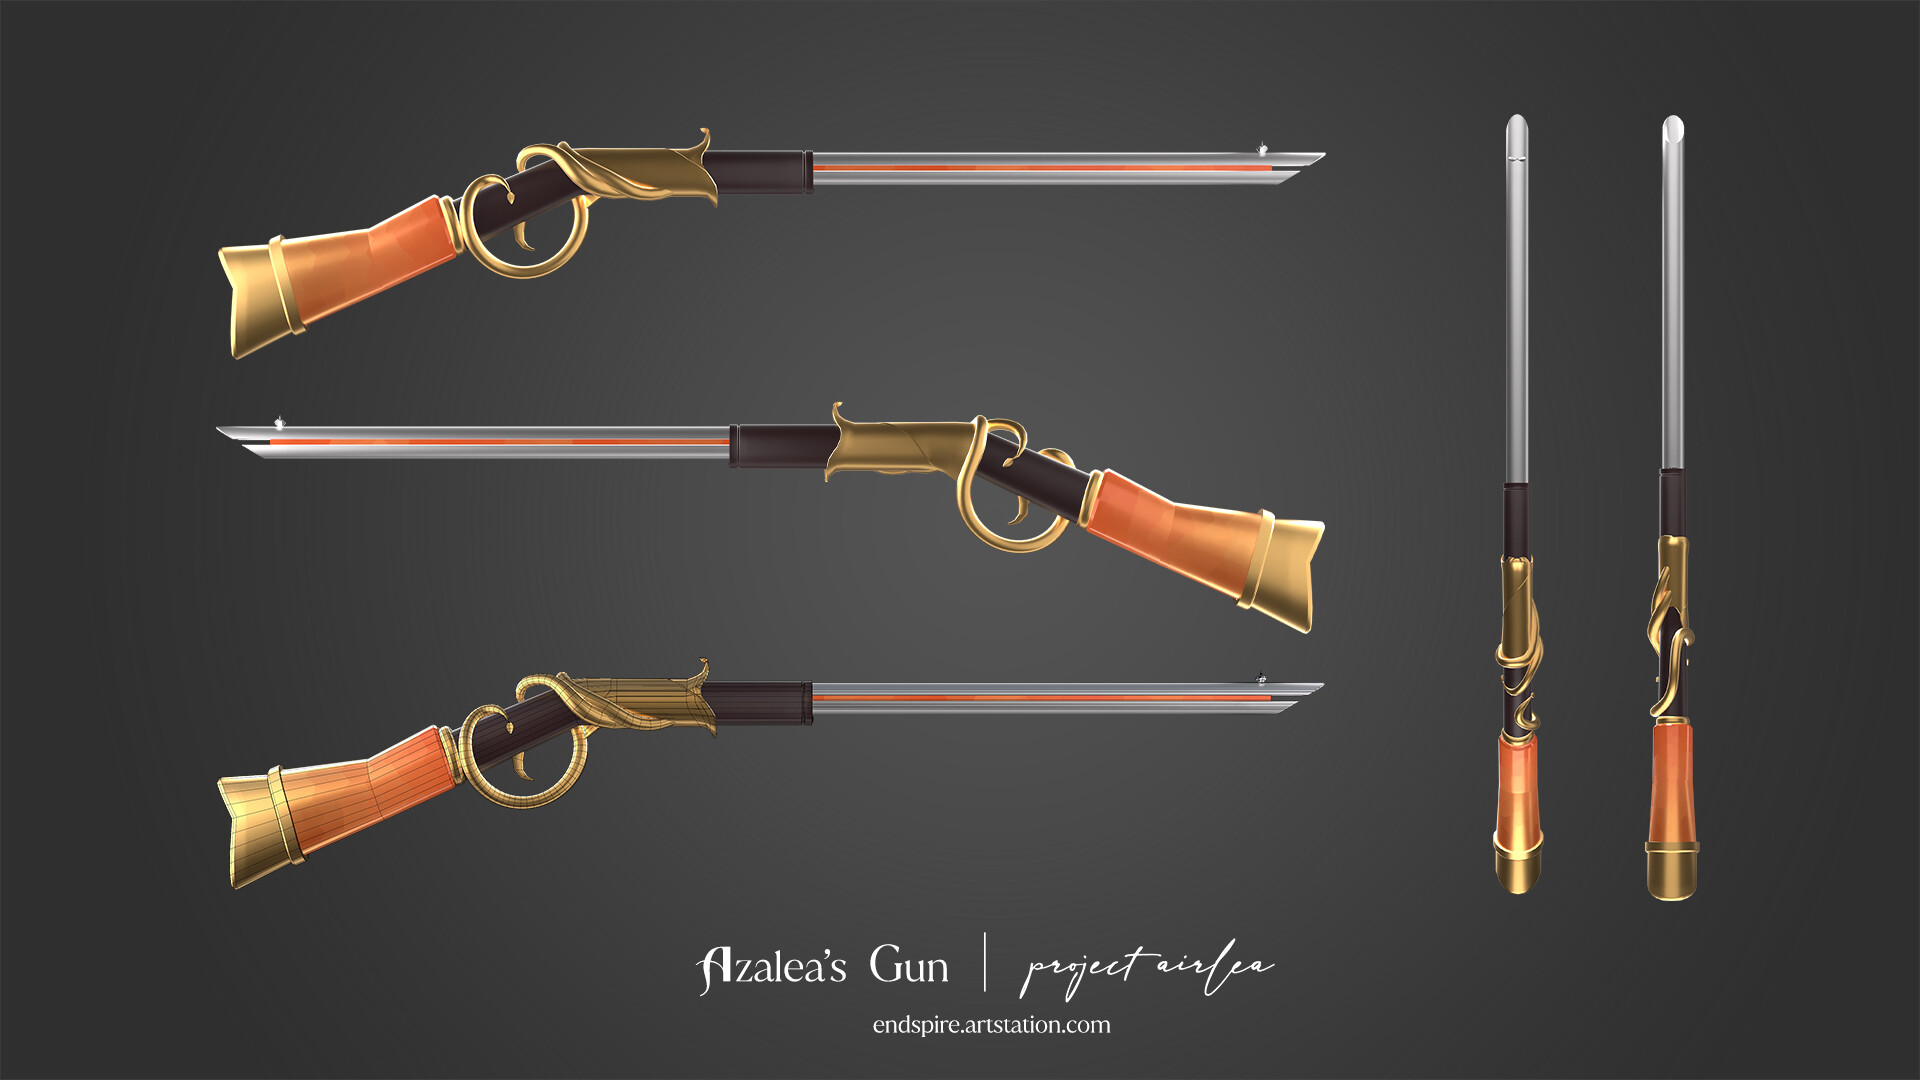
- Azalea's Starshooter Gun is based on a rifle, with a colored inner casing and handle, and gold vines that wrap around the trigger guard. I liked how organic the vine detail felt, but I also decided to make sure the actual trigger guard area was straighter so it could do it's job like a real rifle.
- Like Karis's Sword, the gold vine detail was made by extruding a curve profile along a curve. The vines were easier than the sword guard because the profile is simpler and there's only a little bit of tapering at the very end of the vines.
- Initially there was only a side view of the gun, but Luna generously provided me with notes on how the details look from the quarter view.
✧
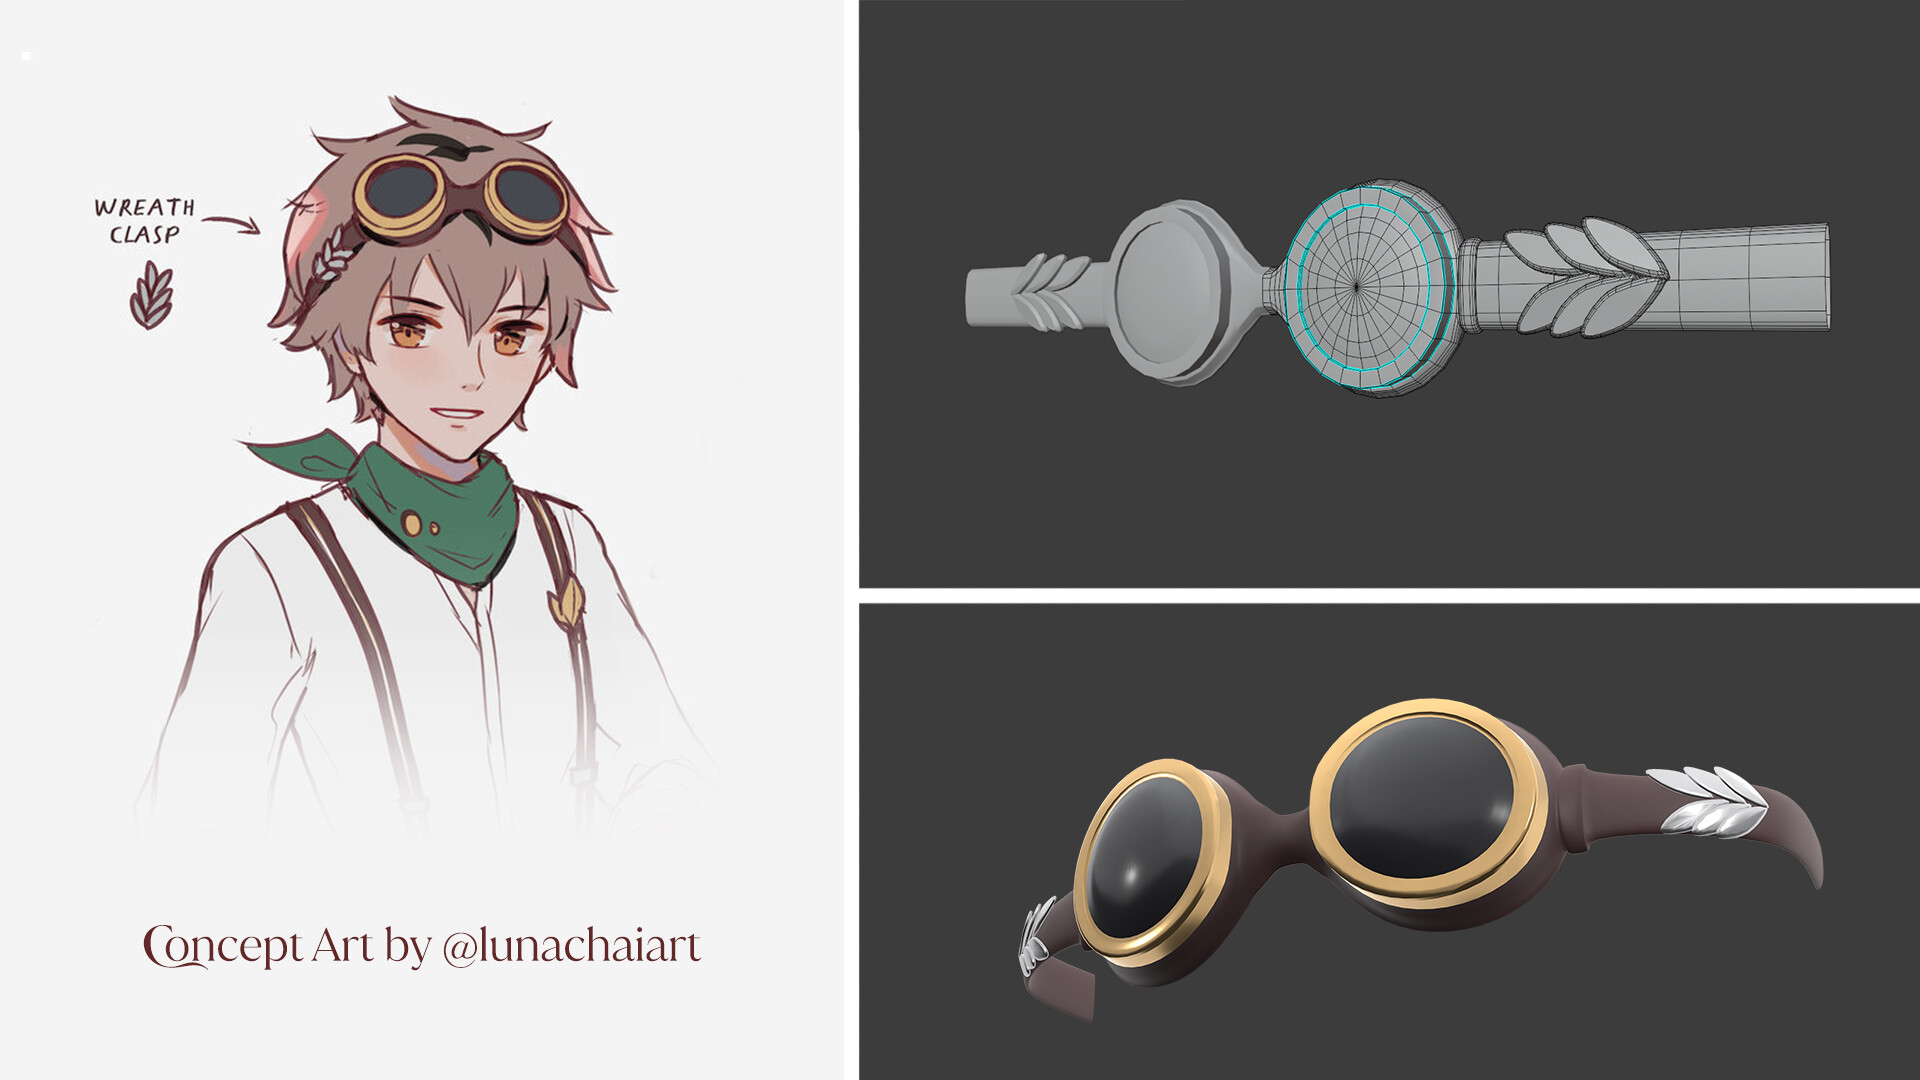
Wes' Goggles
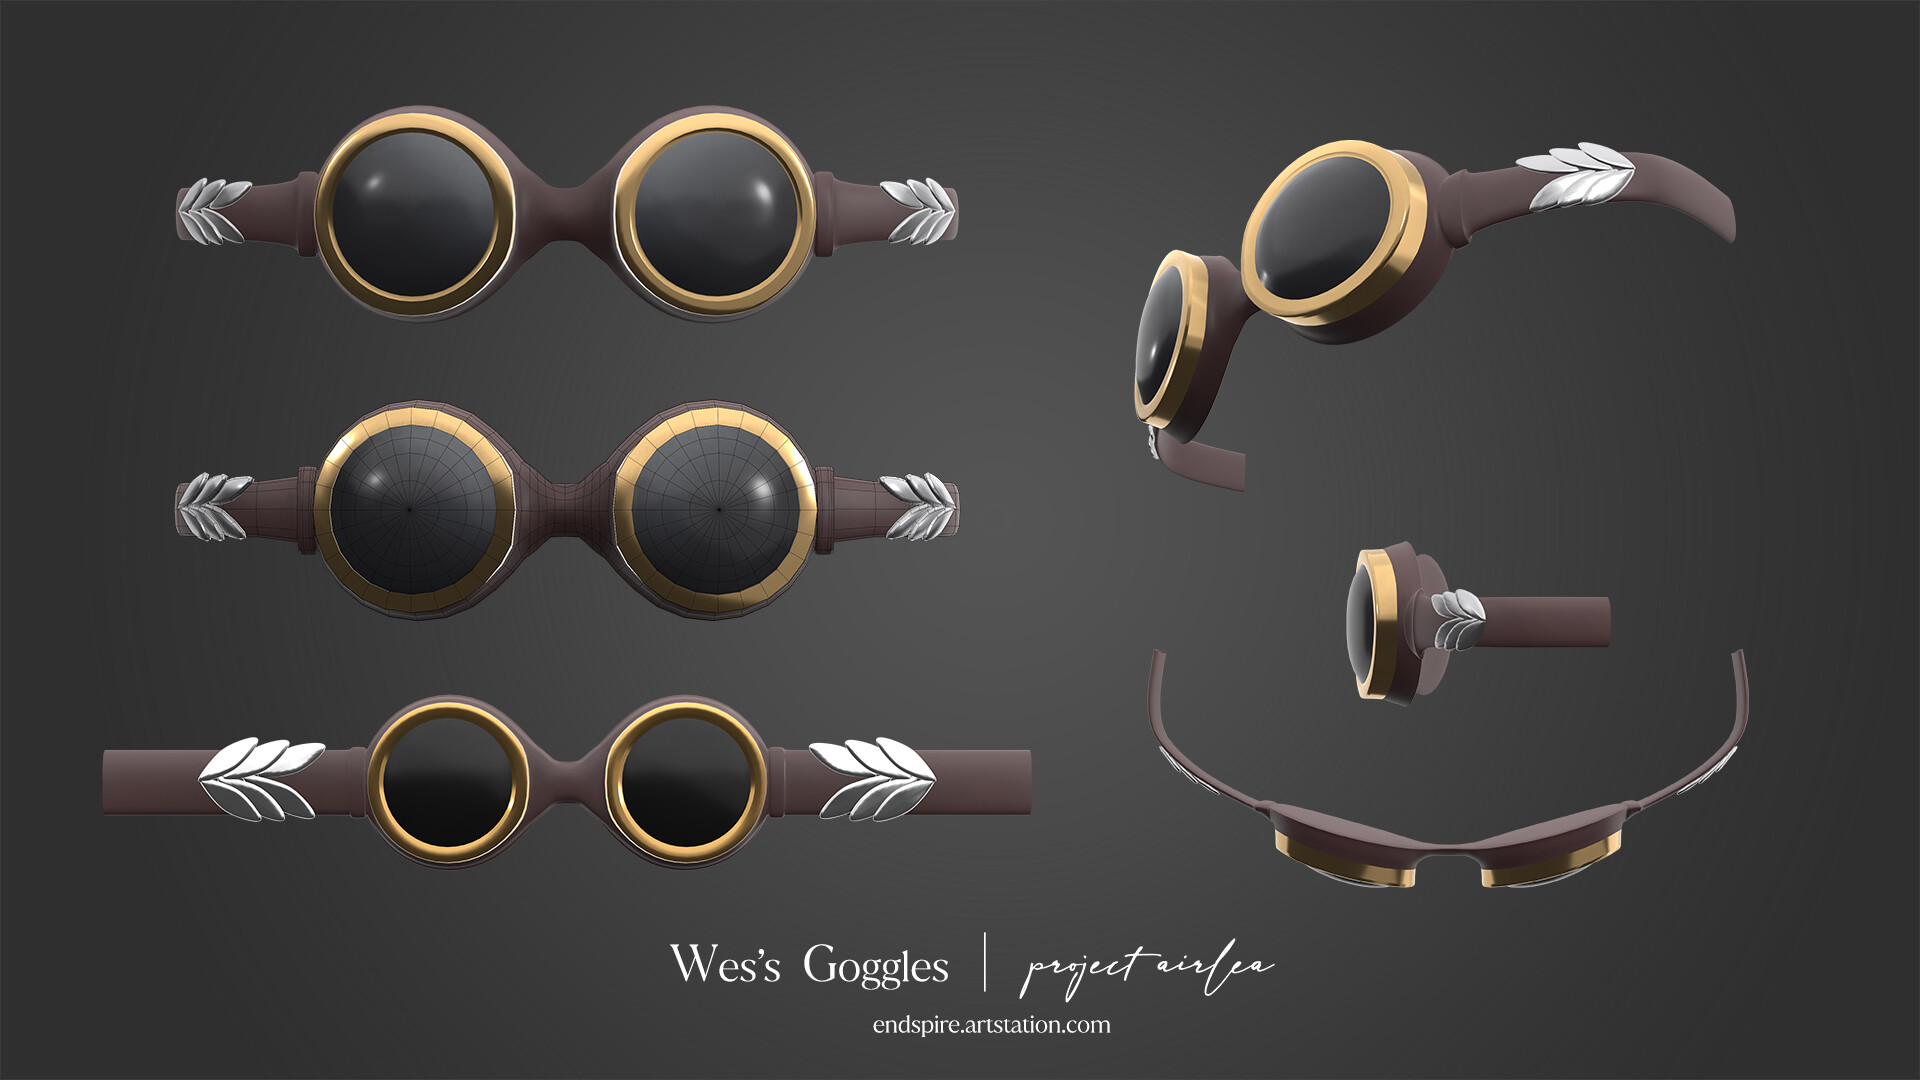
- After two fantastical weapons, Wes's Goggles were comparatively simple! These goggles have large lenses and wreath themed clasps on the sides.
- Because it's a symmetrical object, I was able to model half of the goggles and then mirror it to save time. I modeled everything on a flat plane, and then curved it to fit around a head.
✧
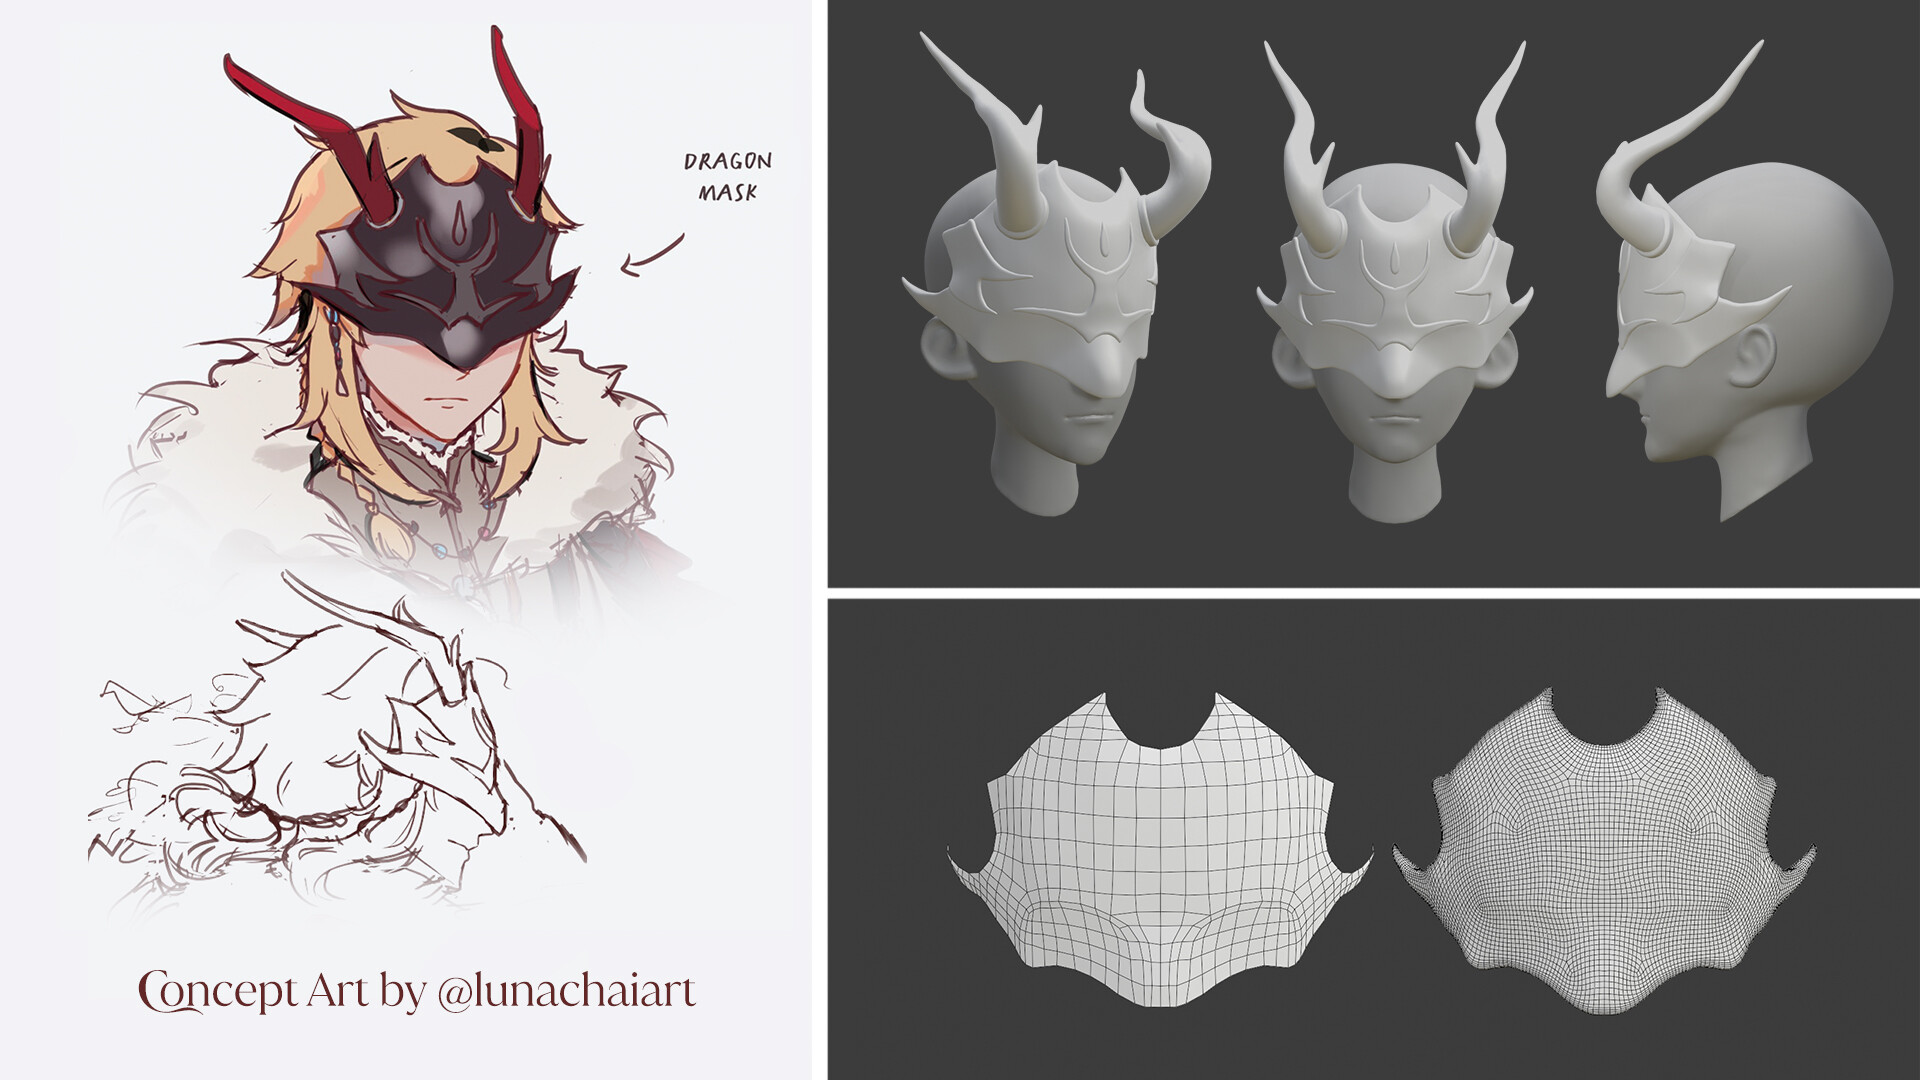
Dragon Whisperer's Mask
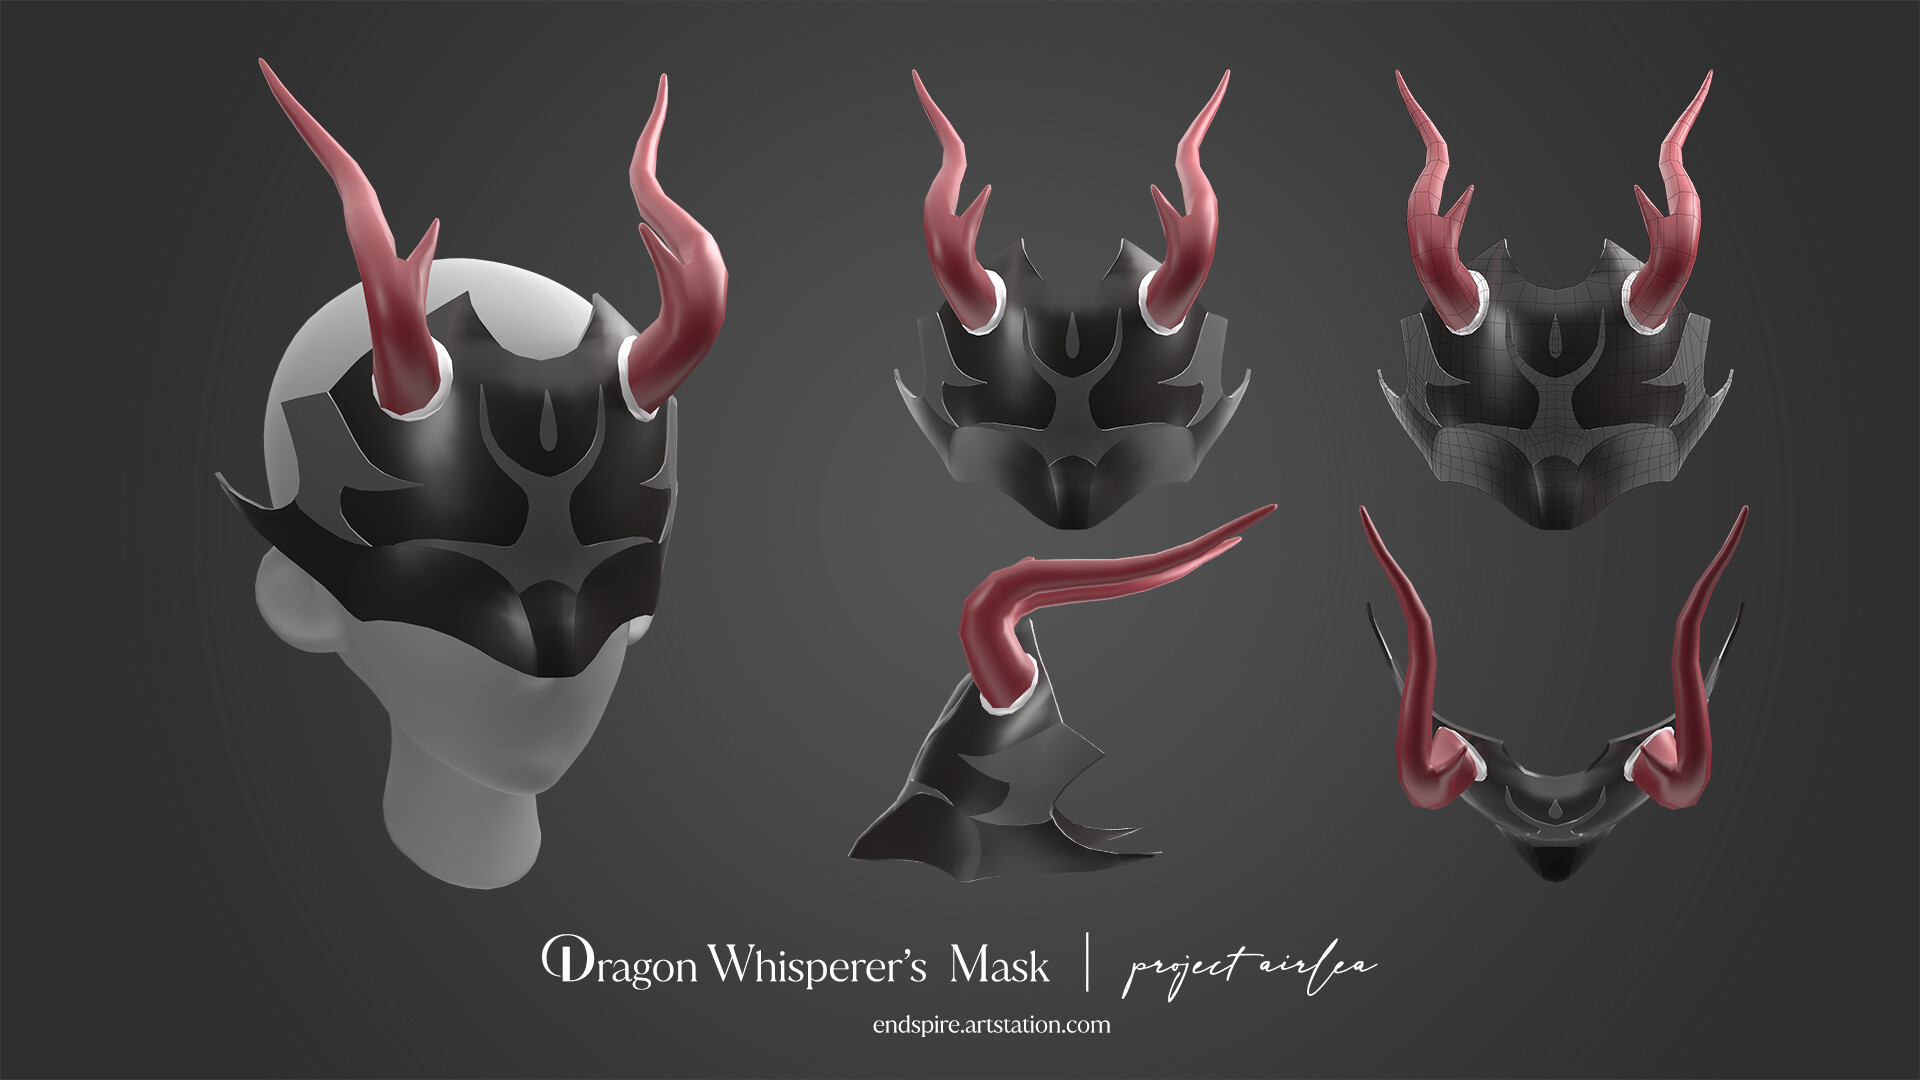
- The Dragon Whisperer's Mask was a fun challenge! It's a hard surface piece with very organic shapes. Not only does the mask conform around a face, but there are details that are conformed around the mask! I worked in Zbrush to make the mask, then I brought it into Blender to retopologize. I'm happy with how neat it came out!
- ZBrush - I used a generic base mesh for the head, editing the proportions to match the character closer. To make sure the mask fit the head perfectly, I masked out the area the mask would be and extracted it to use it as a rough base to work from. It was challenging to sculpt because it was so thin! At first I had the horns going more to the side, but Luna directed me on the correct rotation. I used ZRemesher to simplify the horns, but I wanted to be picky about the topology of the mask, so I brought that into Blender.
- Blender - I wanted the mask to be efficient with it's polygon count, so I carefully went in and drew in the new topology with the Shrink Wrap Modifier. I did the same for the raised detail on the mask. My goal was to preserve the curves and hard edges I had with as few polygons as I could. Looking back I probably could have used even less, but I'm happy with how it came out. For the horns, I deleted the edges they didn't need until they only had enough to keep their essential shape.
✧
Echo's Dagger
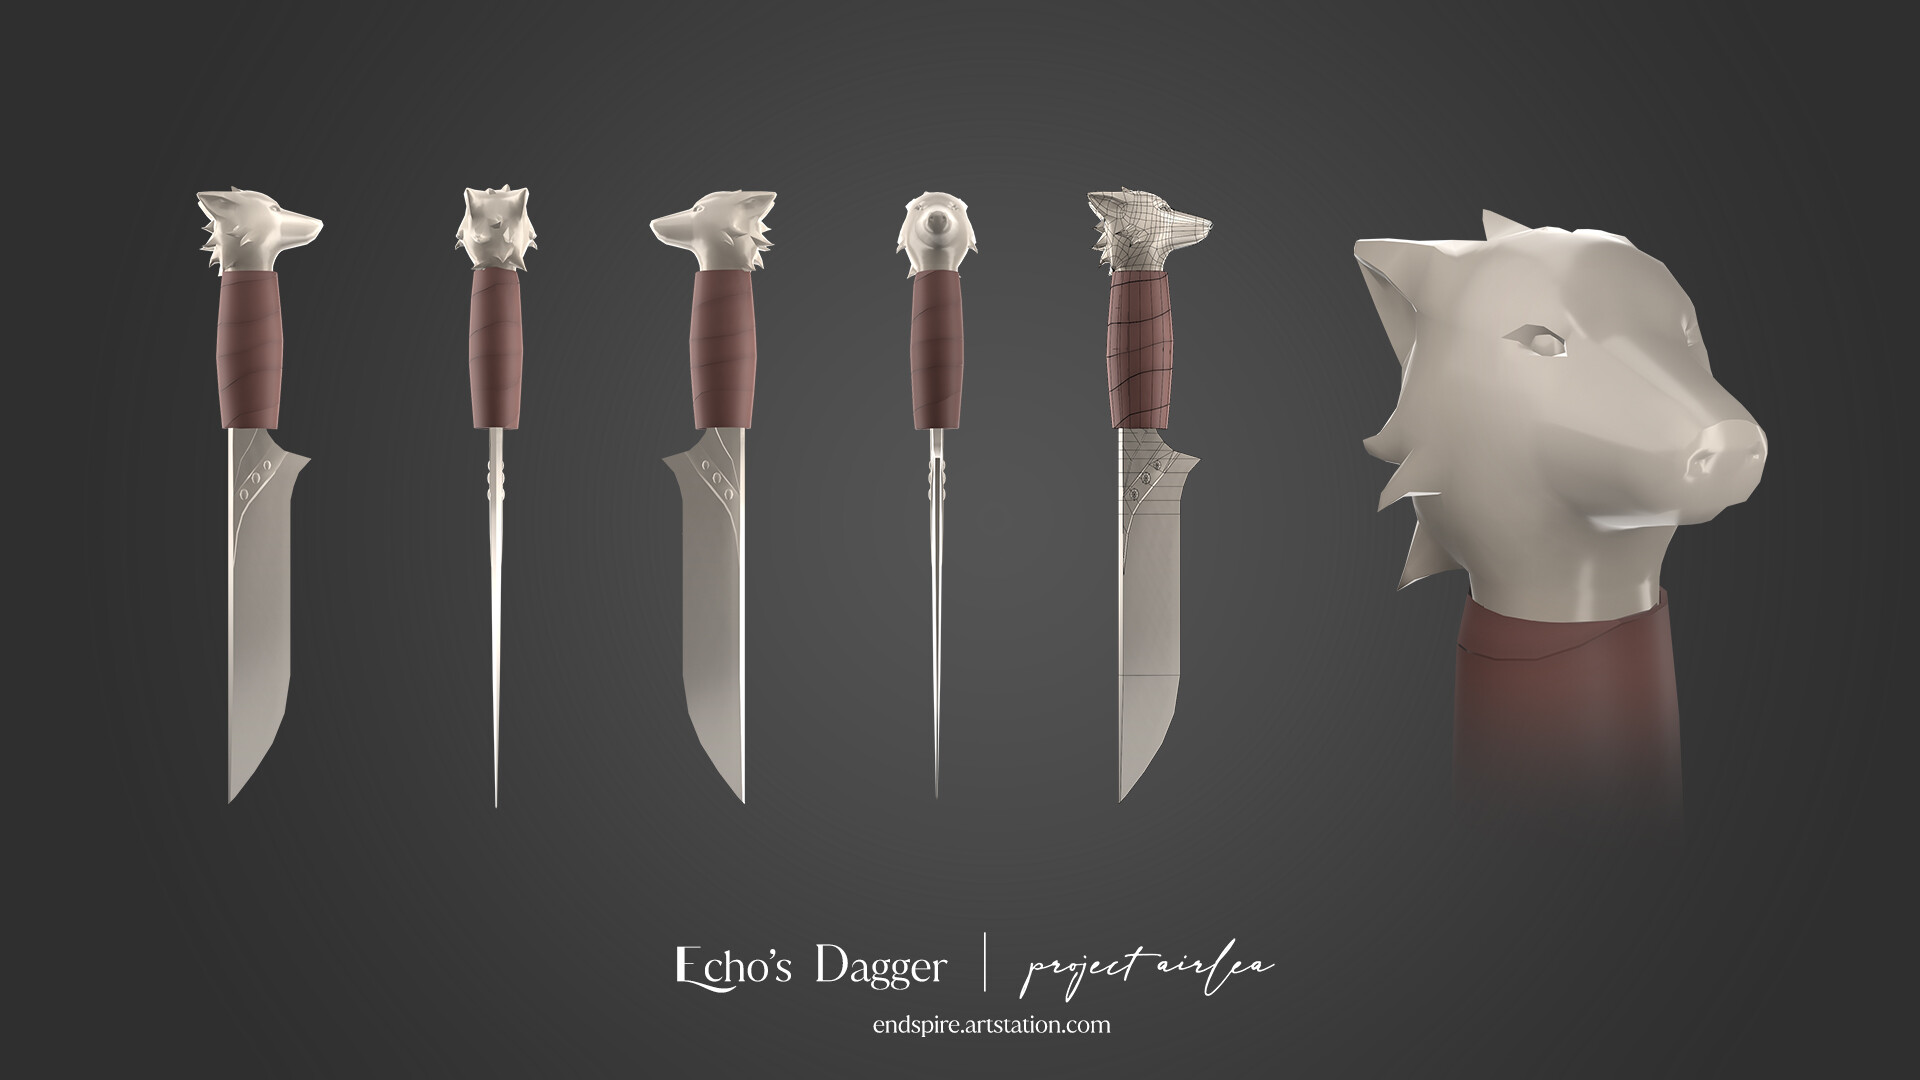
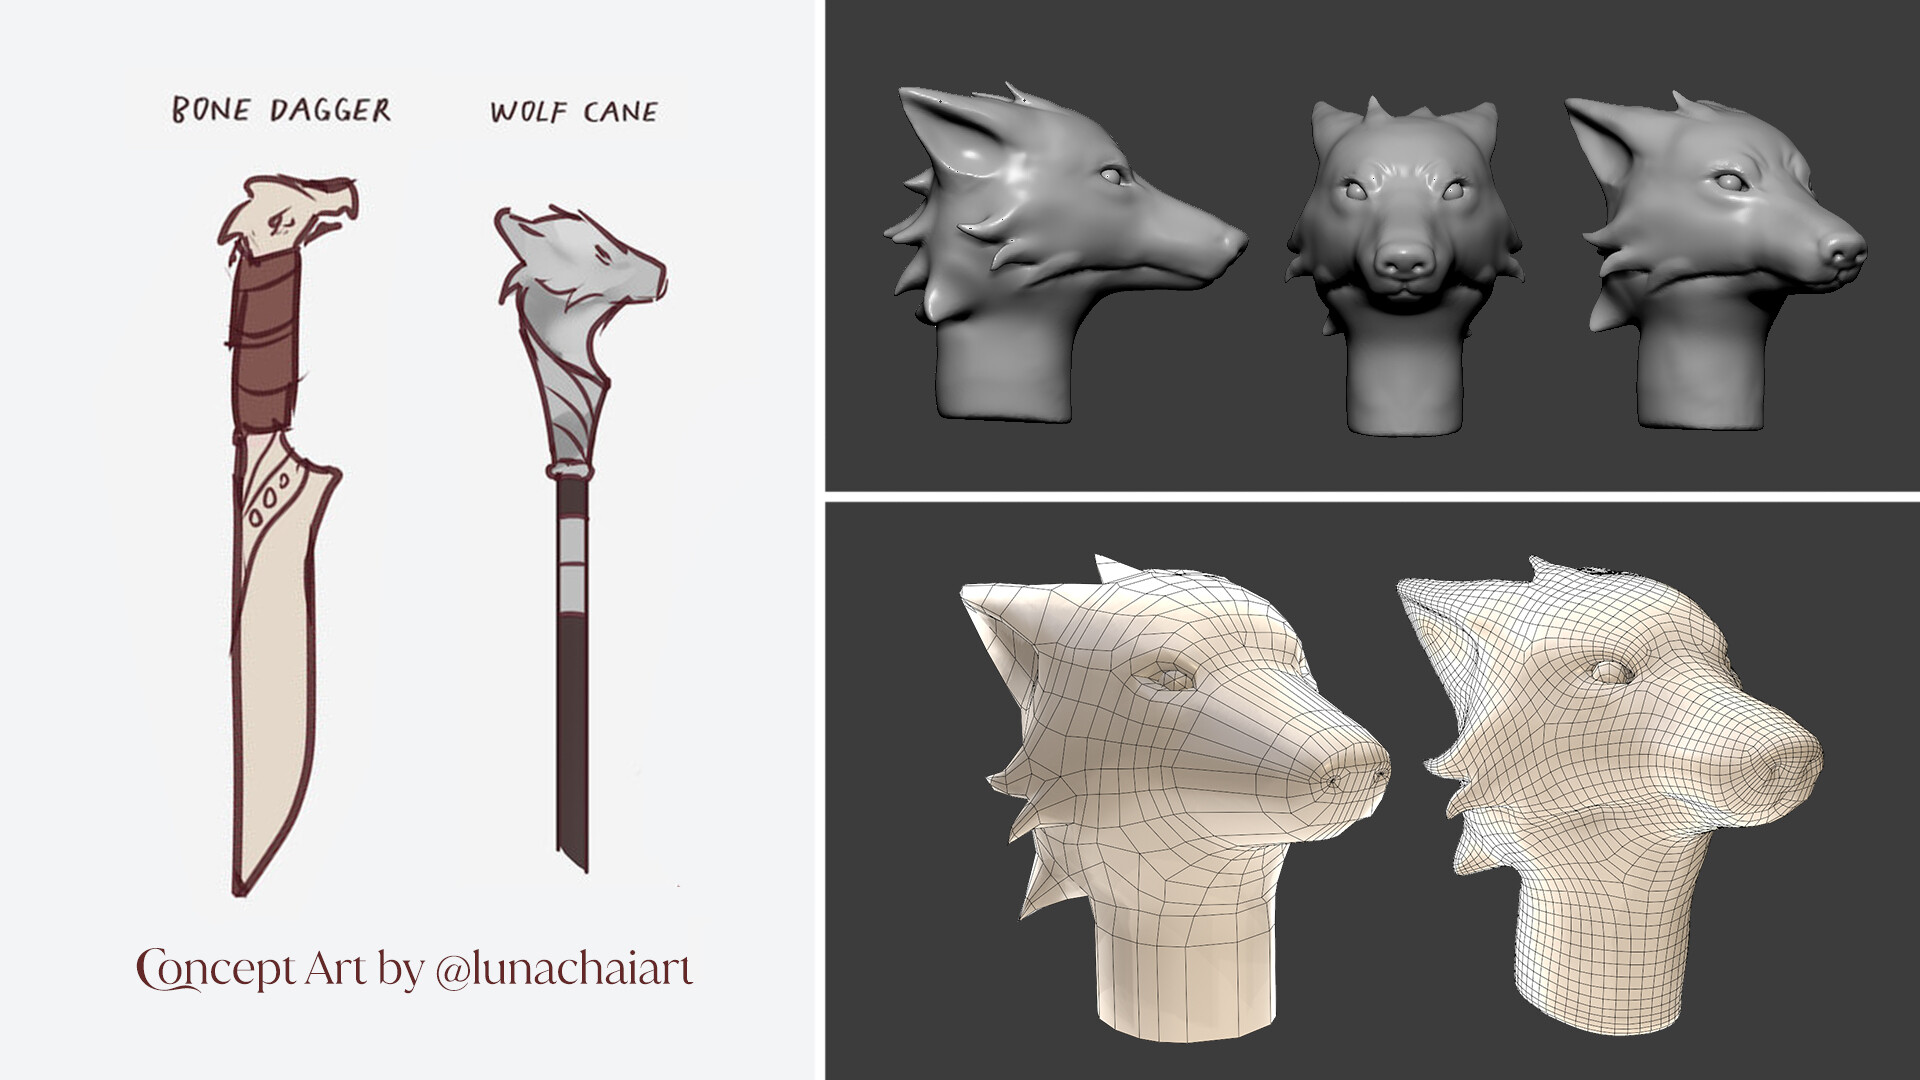
- Echo's Dagger was another object that started it's life as a Zbrush sculpt. This hunting dagger is made of bone and has a wolf head detail on the end. The final head is a lot less detailed than the initial sculpt, but this is by design. The dagger itself is a small detail, so it was more important for the head to have large readable shapes than be highly detailed.
- Zbrush - The character sheet had another object with a wolf head that I used as a reference since it was more detailed. I had to look up a lot of references on how a wolf head is shaped, as well as some metallic wolf sculptures to see how fur is generally sculpted.
- Blender - Like the Dragon Whisperer's mask, I retopologized the head using a Shrink Wrap Modifier. The wolf head was harder to do than the mask because of all of the fur detail! It was challenging to keep the shape accurate while still trying to only use as many polygons as I needed. The rest of the dagger was created in Blender as well.
✧
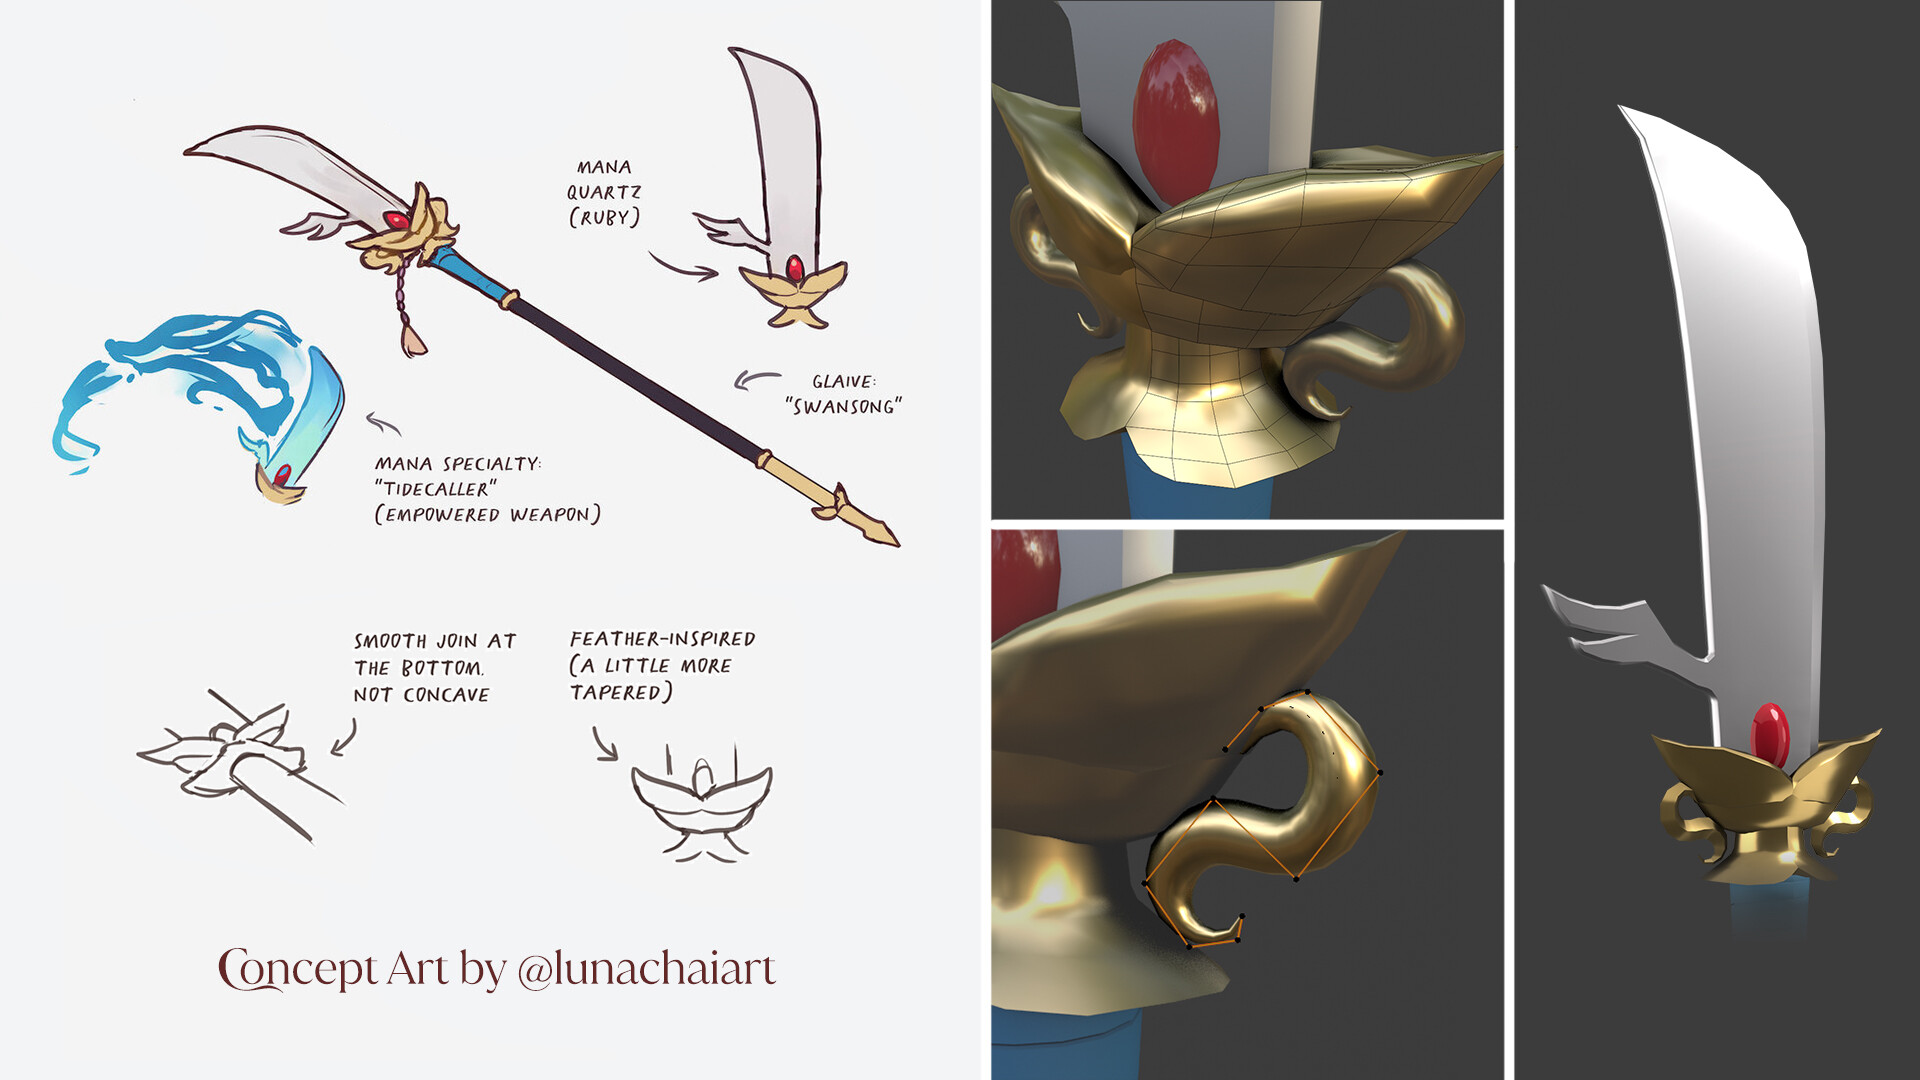
Halcyon's Glaive

- After two models that relied on sculpting and retopology, Halcyon's Swansong Glaive was back to the basics! The general shape of the glaive was straightforward, but I asked Luna for clarification on neck area, since the sketch wasn't clear. There is an attached tassel in the concept art that I was told to leave off, since that can be drawn in later (I completely agree, I also enjoy drawing tassels!)
- A lot of the gold detail areas were modeled as a small piece and then mirrored twice. This saved a lot of time in modeling. A small detail in the neck was created with my old friend, curve modeling. The blade's shape came out very cleanly, I'm quite happy with it!
✧
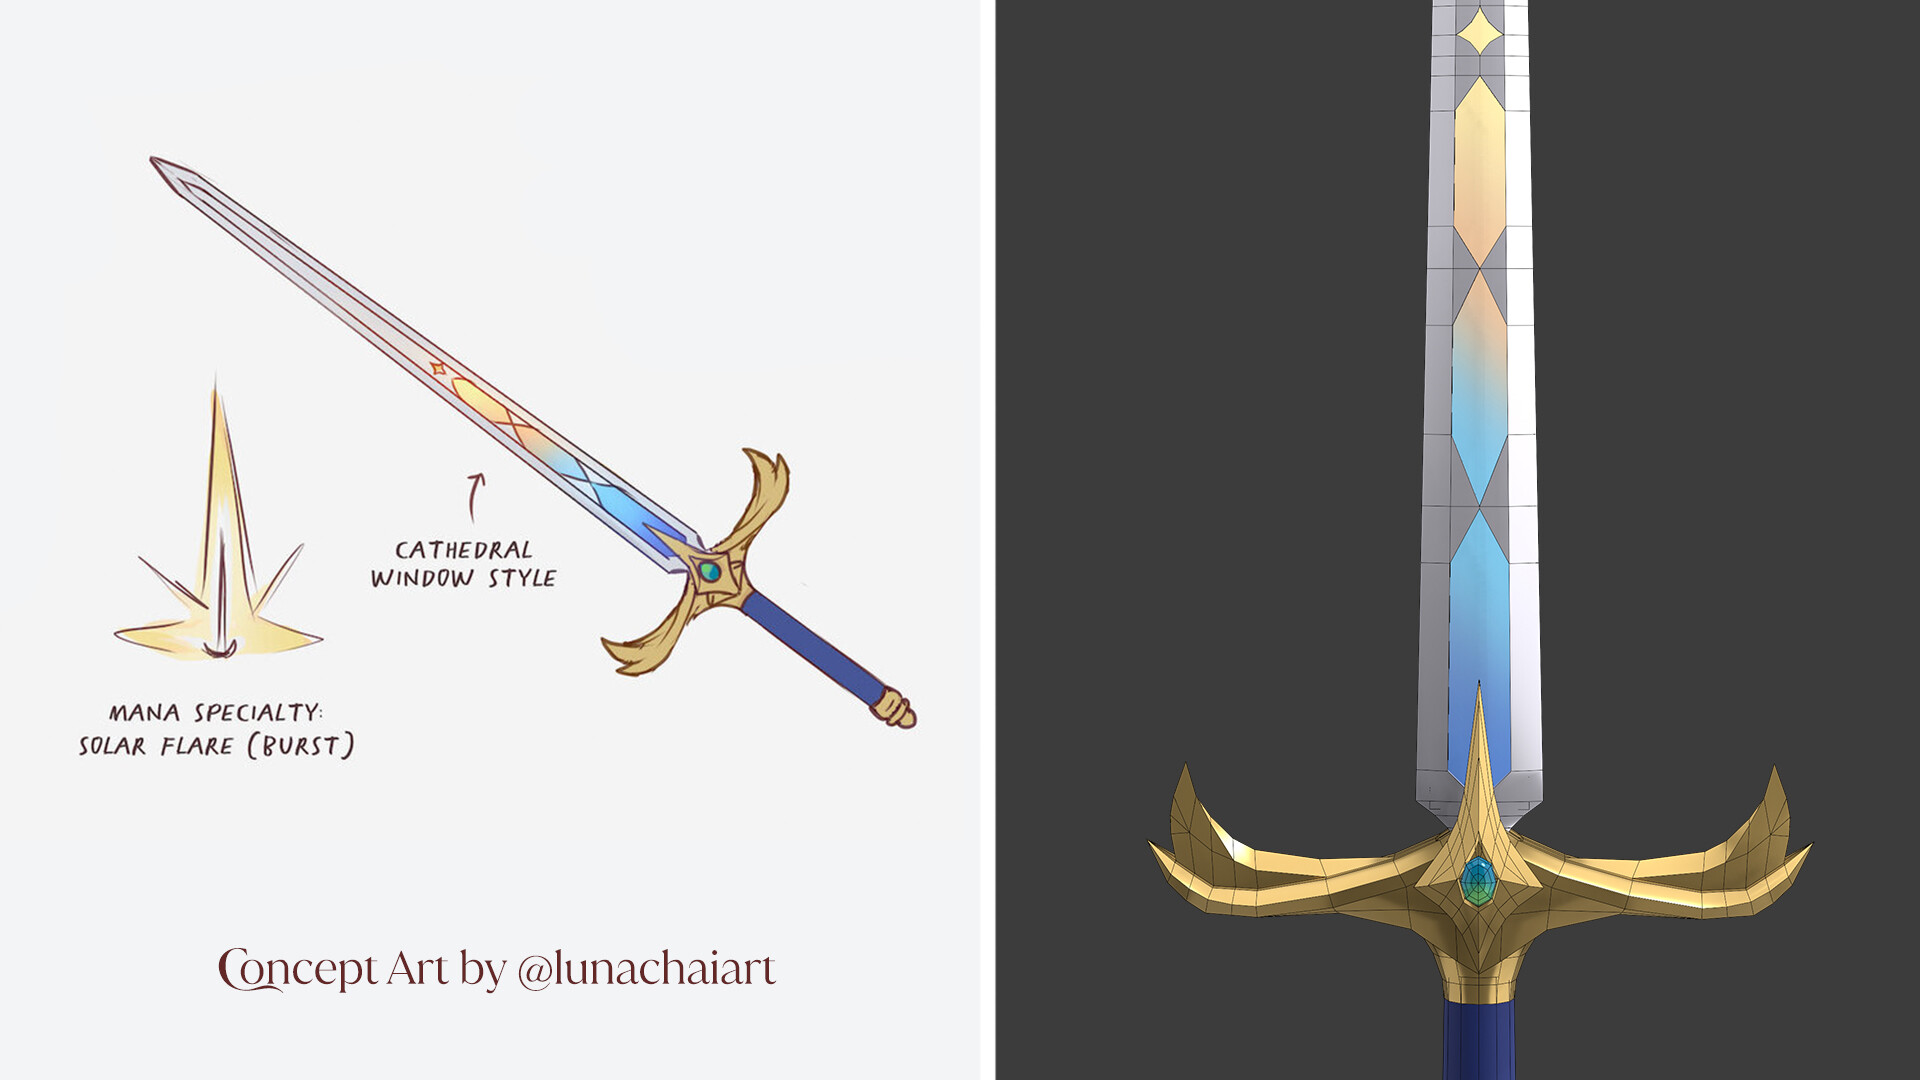
Sethis's Sword
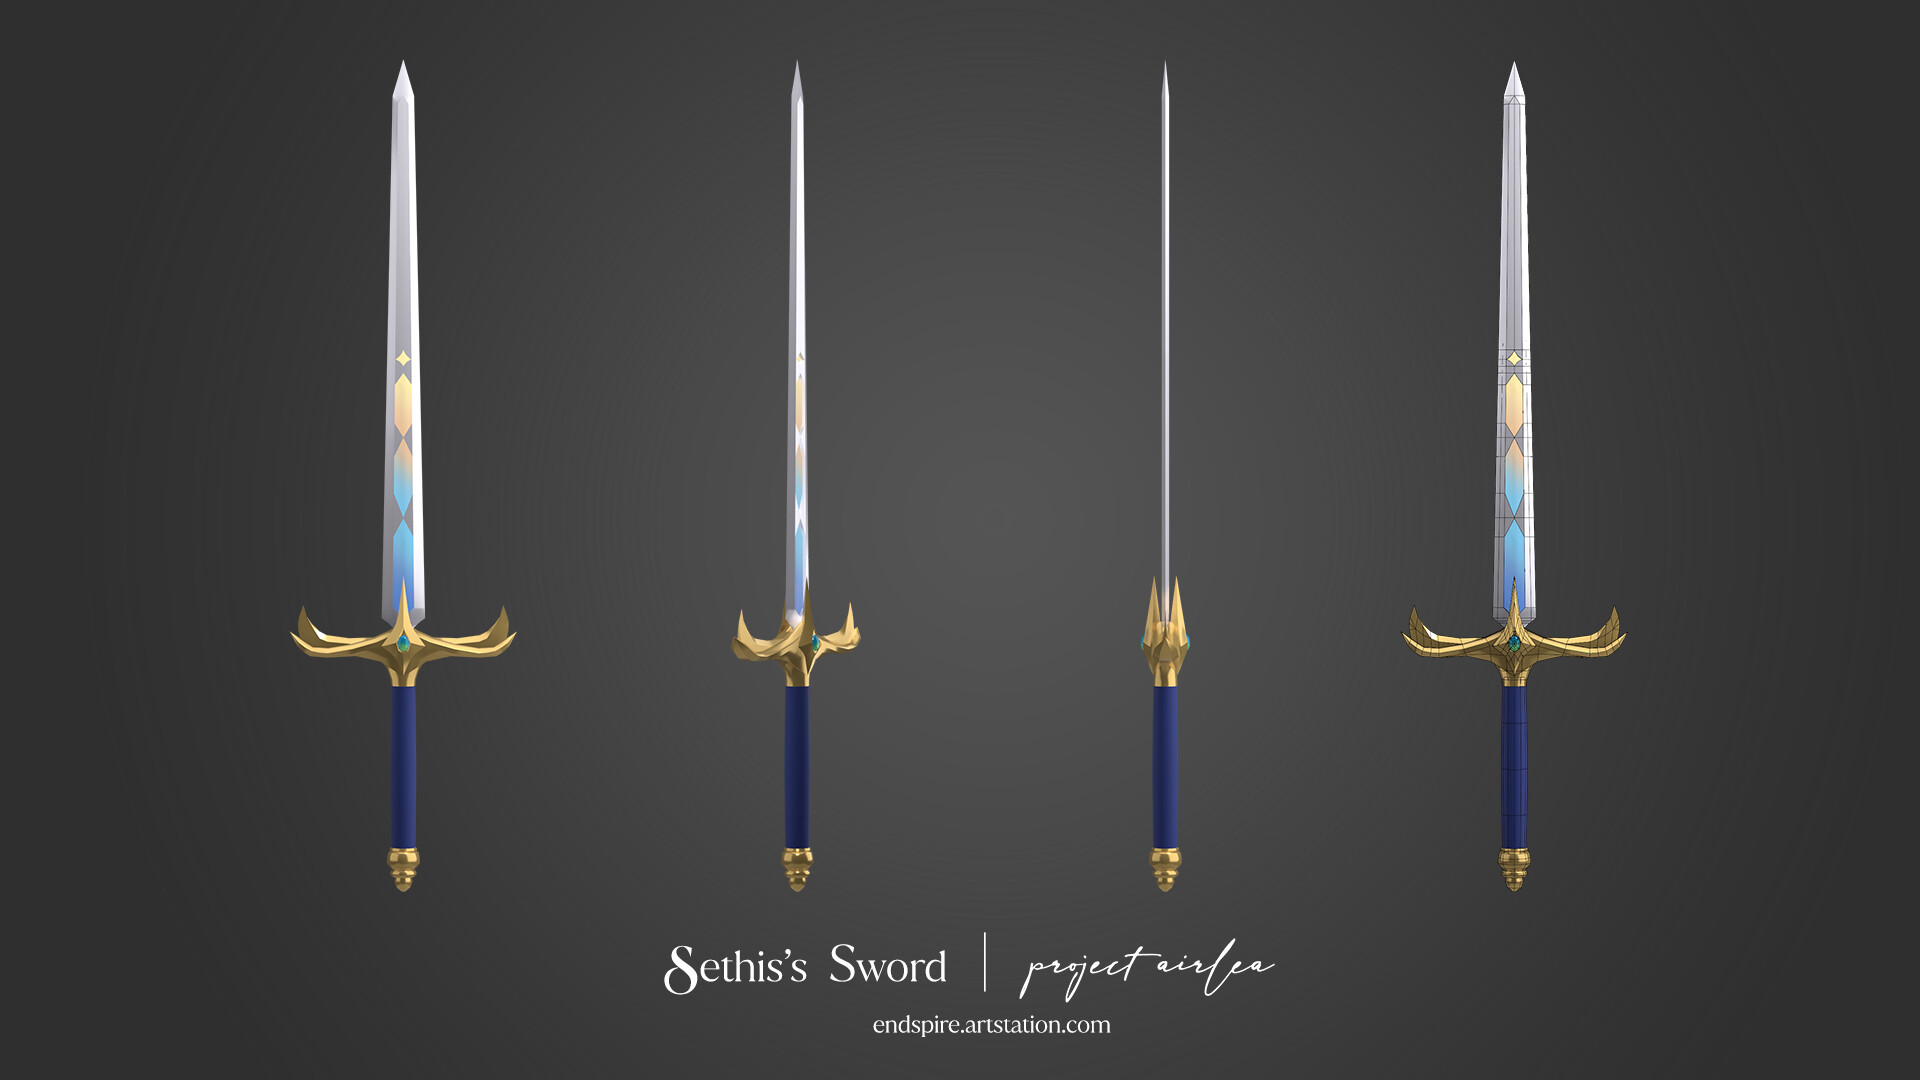
- Sethis's Sword was the last model I made for this project! It looked simple, but had some details that were interesting to interpret, like the hilt. When I was modeling the hilt, I added a few more segments, but it ended up looking like a bunch of bananas! I quickly changed it to something more cool.
- My only regret was not leaving enough of an allowance between the edge of the blade and the window segments to allow myself room to add a bevel there. I think a small bevel would help catch the light and really frame the window parts of the sword nicely. Alas, when I try to do it now, it messes with the nice straight edge of the sword's blade.
✧
After making each modeled I zipped them up and sent them to Luna. I've been told that the models work well in Clip Studio Paint! Mission accomplished!
This was a fun project to be a part of, and I enjoyed how beautifully each design was and how they presented different challenges. Luna Chai was a wonderful client who was enthusiastic and provided clear feedback and communication during the whole process. I did underestimated how long it would take for me to make each model, so I'll learn better for next time. I can't wait to see the models used in the Airlean Tales illustrations.